Some Known Details About Procreate Brushes
Table of ContentsThe 2-Minute Rule for Procreate BrushesHow Procreate Brushes can Save You Time, Stress, and Money.Procreate Brushes - Questions3 Easy Facts About Procreate Brushes ShownThe Definitive Guide for Procreate BrushesExcitement About Procreate BrushesSome Known Questions About Procreate Brushes.
You can add brushes to Procreate by downloading and install. New Procreate brushes can be downloaded and install or purchased from a range of internet sites.Among these attributes is the capacity to add new brushes. Procreate lets you import. brush and. brushset files into the app, giving you a substantial quantity of brand-new tools to play with. Right here's exactly how to add new brushes to Procreate. Before you can include brushes, you'll require to find them.
, an internet site which specializes in attachments for a wide array of art apps. None of their brushes are cost-free, however they're premium. Download and install the.
All about Procreate Brushes
If they're in a. ZIP data, touch the. ZIP file first to draw out the brushes. You'll find your new brushes in the Data application. William Antonelli/Insider Press and hold your finger on a brush data, and also then choose. You'll include the brush to Procreate by "sharing" it.
It took me years to create a collection of Procreate brushes that really felt all-natural and also easy, and I'm confident that you will find them as easy to use as I do. These 10 brushes are a subset of 50+ brushes from my and.
Happy Artists "These brushes are amazing! In all sincerity, I was getting so disappointed with drawing digitally because I seemed like I couldn't find the ideal brushes for Procreate, but these have offered me inspiration once again!" "Just wan na state thank you these are the finest brushes I have ever before utilized.
What Does Procreate Brushes Mean?
They have an impressive option of presets nonetheless the fun is in making your very own Procreate brushes. Procreate offers incredible control over the setups for their brushes.
Below, I have a web link to my youtube video that covers this whole procedure where I walk you through each classification of settings - procreate brushes.
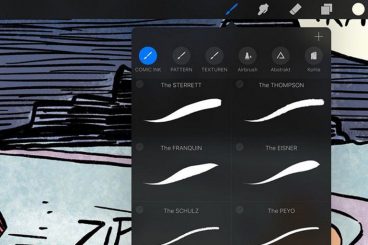
Every brush within Procreate can be discovered by accessing the at the top-right navigation bar in the program. Types of Brushes Procreate's brush collection homes eighteen default brush kinds, such as: A collection of pencil, pastel, pastel, as well as chalk brushes. These are perfect for sketching your attracting out and adding refined hints of structure.
8 Easy Facts About Procreate Brushes Explained
This group is a nice go-to for thicker, ink-style pictures. These brushes include numerous tips of realistic texture to any type of picture as well as are best utilized after the laying out stage. For those that make use of Procreate for lettering and also calligraphy, this is the brush collection to make use of. Made to mimic paint brushes and the buildable structures from this medium.
Perfect for giving any aspect of your illustration an air-brushed, gradient glow. In contrast to the a lot more refined structure brushes, these brushes lean on the side of patterned appearances. Similar to the Appearances comb library, this collection of brushes is much more abstract and patterned. A best for lots of Procreate artists, this brush library includes the excellent degree of charcoal structures to any illustration.
Facts About Procreate Brushes Uncovered
As soon as you click the, you can select from different brushes within the brush collection just as you can with the Brush tool. Eliminating Brushes Eliminating what has been drawn is just a component of the attracting process.
Select the to bring up the brush library to select from. Exactly How to Adjust Default Procreate Brushes By default, the Procreate application features a huge option of pre-made brushes that site musicians can use for various applications. In the Brush Library, you'll find charcoal, paint, impacts, as well as also water brushes. While Procreate's brush collection is rather functional, there will certainly be times when you require to make a couple of tweaks to the default brushes.
The 9-Minute Rule for Procreate Brushes
Duplicate brush. To further organize your custom-made brushes, scroll resource completely to the top of the categories left wing and hit the. You can then drag-and-drop any kind of custom-made brushes into the brand-new area. Step 2: Edit Stroke Characteristics and Taper Once you have actually discovered a brush to customize, click the brush preview to open up the.
Each area consists of sliders that can be used to tailor the appearance of the stroke and its actions. The very first panel in the section is the. procreate brushes. Spacing, Jitter, and also Autumn Off are all buildings that affect the spacing of the source picture used to produce the stroke. alters the spacing in between each plot factor, while changes the spacing that is countered from the stroke line.
This tool this link maintains your stroke appearance and also is ideal when making use of Procreate for hand-lettering functions. This menu reveals sliders that impact the appearance of the taper at the end of the brush stroke.
What Does Procreate Brushes Mean?
applies the taper impact to the overall brush. The staying sliders customize the taper amount, size, opacity, pressure, as well as idea. Trying out these sliders and also examination out the custom-made settings by drawing within the Drawing Pad. Action 3: Modify Forming Source Residence Brushes in Procreate begin as a single form.
The panel contains sliders to modify the scatter as well as rotation of the brush form. refer to the positioning of the brush within the stroke. A higher worth of Scatter produces a textured brush, while a reduced value of Scatter creates a spotted impact. The slider affects the brush's turning as well as just how it replies to directional modification.
adds anti-aliasing, uses earlier versions of filtering system, as well as takes away all filtering system. The most effective alternative for a clean brush look is the filtering. Tip 4: Adjust Grain Effects In Procreate, the brush stroke works as a hair of singular shapes. Within the form holds the grain. Consider the brush's grain as a paint roller, as the brush is attracted on the canvas, the grain reversals as well as size.